Building a Custom PC: A Comprehensive Guide for Beginners
Welcome to the world of custom PC building! Whether you’re a gaming enthusiast or a content creator, building your own PC can be a rewarding experience that not only saves you money but also allows you to customize your machine according to your own needs and preferences. However, for beginners, it can seem like a daunting task. Fear not, in this comprehensive guide, we’ll walk you through all the steps involved in building a custom PC from scratch. By the end, you’ll have all the knowledge and confidence you need to create your very own personalized PC masterpiece.
Why Build a Custom PC?
Before we dive into the nitty-gritty of building a custom PC, let’s first talk about why it’s a great idea in the first place. The most obvious advantage is cost savings. Pre-built PCs often come with a hefty price tag, but you can build your own PC with the same specifications at a fraction of the cost. Moreover, custom PCs offer much more flexibility and freedom when it comes to selecting the components and design. You have complete control over the quality and performance of every aspect of your PC, from the processor and graphics card to the case and cooling system. Plus, building a PC can be a fun and educational experience, giving you a deeper understanding of how computers work.
Step-by-Step Guide to Building a Custom PC
Step 1: Define Your Needs
The first step in building a custom PC is to determine what you want to use it for. Are you a hardcore gamer who needs a high-end graphics card and processor? Or do you primarily need a powerful machine for video editing or graphic design? Each use case requires different components, so it’s important to identify your needs before making any purchases.
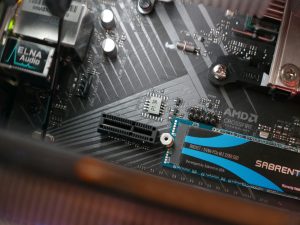
Step 2: Choose Your Components
Once you know what you need, it’s time to start selecting the individual components. The key components of a PC include the processor, motherboard, graphics card, RAM, storage, power supply, and case. There are a plethora of options available for each, so it’s important to do your research and read reviews to make informed decisions. Consider factors like compatibility, performance, and budget when selecting your components.
Step 3: Assemble Your Parts
Once you have all your components, it’s time to start putting them together. This is where things can get a bit tricky, so it’s important to take your time and follow the instructions carefully. Start by installing the processor onto the motherboard, then add the RAM, graphics card, storage, and power supply. Don’t forget to connect all the cables and ensure everything is securely in place.
Step 4: Install the Operating System
With all the hardware in place, it’s now time to install the operating system (OS). You can choose from Windows, macOS, or a variety of Linux distributions. Most modern PCs have a USB drive slot, so you can easily download the OS onto a flash drive and install it onto your new PC.
Step 5: Test and Troubleshoot
Once everything is assembled and the OS is installed, it’s time to power on your new PC! If all goes well, you should enter the BIOS setup screen, where you can check for any errors or incompatibilities. If your PC doesn’t boot or runs into issues, don’t panic. Take your time and troubleshoot the problem, or seek help from online forums or tech-savvy friends.
Custom PC Building Tips and Tricks
Now that you’ve learned the basics of building a custom PC, here are a few extra tips to ensure you have a smooth and successful build:
1. Don’t Cheap Out on the Power Supply
Choosing a reliable and efficient power supply is crucial to the performance and longevity of your PC. Don’t try to save a few bucks by buying a low-quality power supply – it simply isn’t worth the risk!
2. Don’t Forget About Cooling
Depending on your use case, your PC may generate a lot of heat. It’s important to have proper cooling in place to prevent your components from overheating and damaging the performance of your PC. Consider investing in an aftermarket CPU cooler, as well as additional case fans.
3. Plan for Future Upgrades
Technology is constantly evolving, and in a few years, you may want to upgrade your PC with newer and more powerful components. When selecting your components, leave some room for future upgrades so you won’t have to replace everything when the time comes.
Conclusion
Building a custom PC may seem like a daunting task, but with the right knowledge and guidance, it can be a fun and fulfilling experience. By following this guide and keeping these tips in mind, you can create a personalized PC that suits your specific needs and fits your budget. Don’t be afraid to experiment and have fun – after all, you’re creating your very own dream machine from scratch! Happy building!